
---
**Introduction**
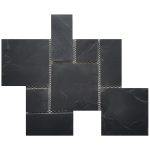
Cultured stone has become a popular choice in modern architecture and design due to its aesthetic appeal, versatility, and cost-effectiveness. Composed of a mixture of cement, aggregates, and pigments, cultured stone mimics the appearance of natural stone but is lighter and easier to install. However, like any material, it can suffer from wear and tear, damage, or aesthetic degradation over time. This article will delve into the various aspects of cultured stone repair, providing you with comprehensive techniques, tips, and best practices to restore your cultured stone surfaces to their former glory.
**Understanding Cultured Stone**
Before discussing repair techniques, it's essential to understand what cultured stone is and how it differs from natural stone. Cultured stone, also known as manufactured stone, is engineered to resemble natural stone but is produced in a controlled environment. https://www.fs-slate.com/stepstone-pavers-the-ultimate-guide-to-outdoor-elegance/ allows for consistent quality and a wide variety of styles, colors, and textures.
Cultured stone is typically used in exterior applications such as siding, landscaping, and accent features, as well as in interior design for fireplaces, walls, and other architectural elements. While it is designed to be durable, it is not immune to damage from impacts, weather conditions, or improper installation.
**Common Issues with Cultured Stone**
Before we dive into repair techniques, let’s identify some common issues that may arise with cultured stone installations:
1. **Cracks and Chips**: Impact from objects, shifting foundations, or thermal expansion can lead to cracks or chips in the stone surface.
2. **Discoloration**: Over time, exposure to sunlight, moisture, and dirt can cause fading or discoloration.
3. **Loose Stones**: Improper installation or degradation of the adhesive can lead to stones becoming loose or detached.
4. **Mold and Mildew**: Areas with high humidity or poor drainage can develop mold or mildew on the stone surface.
5. **Efflorescence**: This white powdery substance can form on the surface due to moisture evaporating and leaving behind mineral deposits.
**Preparing for Repair**
Before undertaking any repair work, it's crucial to prepare adequately. Here are the steps you should follow:
1. **Assess the Damage**: Thoroughly inspect the cultured stone to identify all areas that require repair. This includes checking for cracks, chips, discoloration, and loose stones.
2. **Gather Tools and Materials**: Depending on the type of repair needed, you may require the following tools and materials:
- Safety goggles and gloves
- Clean cloths and brushes
- Mild detergent or stone cleaner
- Epoxy or stone adhesive
- Caulking gun
- Trowel or putty knife
- Touch-up paint or stain that matches the cultured stone
- Sealer for protection
3. **Clean the Area**: Before starting repairs, clean the damaged area to remove dirt, dust, and debris. Use a mild detergent and water, and ensure the surface is dry before proceeding.
**Repair Techniques**
Now, let’s explore various repair techniques for different issues in cultured stone:
### 1. Repairing Cracks and Chips
**Materials Needed**:
- Epoxy or stone adhesive
- Trowel or putty knife
- Touch-up paint or stain
**Steps**:
1. **Clean the crack or chip**: Remove any loose debris and dust.
2. **Mix the epoxy**: Prepare the epoxy or adhesive as per the manufacturer’s instructions.
3. **Apply the epoxy**: Use a trowel or putty knife to fill the crack or chip with the mixed epoxy. Ensure the adhesive is pressed firmly into the damaged area.
4. **Smooth the surface**: Use the trowel to smooth out the repair, making it level with the surrounding stone.
5. **Allow to cure**: Let the epoxy cure according to the manufacturer's instructions.
6. **Touch up the finish**: Once cured, apply touch-up paint or stain to match the surrounding stone.
### 2. Reattaching Loose Stones
**Materials Needed**:
- Stone adhesive
- Caulking gun
- Clean cloth
**Steps**:
1. **Remove loose stones**: Carefully pry the loose stones away from the wall or surface.
2. **Clean the surfaces**: Clean both the back of the stone and the area where it will be reattached.
3. **Apply adhesive**: Use a caulking gun to apply a generous bead of stone adhesive to the back of the stone.
4. **Reattach the stone**: Press the stone firmly back into place. Ensure it is aligned properly with adjacent stones.
5. **Clean excess adhesive**: Wipe away any excess adhesive that squeezes out with a clean cloth.
6. **Allow to set**: Leave the stone undisturbed for the recommended setting time.
### 3. Cleaning Discoloration
**Materials Needed**:
- Mild detergent or stone cleaner
- Soft brush or cloth
- Water
- Sealer (optional)
**Steps**:
1. **Prepare the cleaning solution**: Mix mild detergent with water as per manufacturer’s instructions.
2. **Scrub the surface**: Use a soft brush or cloth to scrub the discolored areas gently.
3. **Rinse thoroughly**: Rinse the area with clean water to remove any detergent residue.
4. **Allow to dry**: Let the stone surface dry completely.
5. **Apply a sealer**: If desired, apply a stone sealer to protect the surface and enhance its appearance.
### 4. Addressing Mold and Mildew
**Materials Needed**:
- Mild detergent or specialized mold cleaner
- Soft brush or cloth
- Water
- Protective gear (gloves, mask)
**Steps**:
1. **Wear protective gear**: Always wear gloves and a mask when handling mold.
2. **Prepare the cleaning solution**: Mix a mild detergent or a specialized mold cleaner with water.
3. **Scrub the affected area**: Use a soft brush or cloth to scrub the mold or mildew gently.
4. **Rinse thoroughly**: Rinse the area with clean water to remove any cleaning solution.
5. **Allow to dry**: Ensure the area is completely dry to prevent mold from returning.
### 5. Fixing Efflorescence
**Materials Needed**:
- Soft brush
- Water
- Mild detergent (if necessary)
**Steps**:
1. **Brush off the efflorescence**: Use a soft brush to gently scrub away the white powder.
2. **Rinse with water**: Rinse the area with clean water to remove any remaining residue.
3. **Prevent future efflorescence**: Ensure proper drainage and seal the stone to prevent moisture intrusion.
**Preventative Maintenance**
After repairing cultured stone, it’s essential to perform regular maintenance to prolong the life of your surfaces. Here are some key preventative measures:
1. **Regular Cleaning**: Keep the stone clean by washing it with mild detergent and water periodically. This prevents the buildup of dirt and grime.
2. **Seal the Surface**: Apply a high-quality stone sealer every few years to protect against moisture, stains, and efflorescence.
3. **Inspect Regularly**: Conduct regular inspections for any signs of damage, discoloration, or loose stones. Early detection can prevent more extensive repairs later on.
4. **Address Moisture Issues**: Ensure proper drainage around your cultured stone installation to prevent water damage and mold growth.
5. **Avoid Abrasive Cleaners**: Do not use harsh chemicals or abrasive cleaners, as these can damage the surface of the cultured stone.
**Conclusion**
Cultured stone adds beauty, elegance, and value to both residential and commercial properties. However, like any material, it requires care and maintenance to keep it looking its best. By understanding common issues and employing the right repair techniques, you can restore and maintain your cultured stone surfaces effectively.
Whether you’re dealing with cracks, discoloration, or loose stones, the steps outlined in this article will guide you through the repair process. Remember always to prioritize safety and follow manufacturer instructions for materials used.
By investing time and effort into proper maintenance and timely repairs, you can ensure that your cultured stone continues to enhance your space for years to come. With the right tools, techniques, and a little bit of know-how, you can achieve a flawless finish and enjoy the beauty of cultured stone in your home or business.
---
This article provides a detailed exploration of cultured stone repair. For a more extensive discussion or specific case studies, further research and practical examples could be included.